Initializing and Deploying the Echo360 POD
Each college/department liaison will be made an administrator on the UIC Echo360 Portal, which will allow the creation and configuration of the echo devices in the classrooms.
-
Download the generic device configuration file (device.xml) from the Echo360 Server.
-
Log into Echo360 as an administrator (echo360.org)
-
Insert a FAT 32 formatted USB thumb drive into the computer.
-
Open the Settings menu and select Configurations.
-
Select Device default configurations from the options on the left.
-
Select the Common Settings tab and click Download at the bottom of the page.
-
Store this file on a USB flash drive (FAT32 formatted). Do not rename or edit this device.xml in any way. This file must be named exactly device.xml and it should be the only file on the USB drive.
-
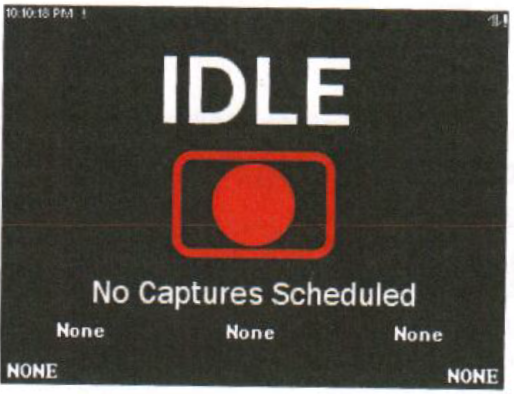
Power the POD and plug in the Ethernet cable to a live data jack. It is important to wait until the POD has completely booted up, and the Status Screen is displayed:
-
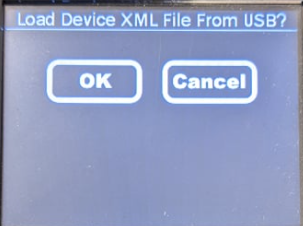
Once the Status Screen is displayed, insert the USB flash drive into the back of the POD. It may be a snug fit – please be sure to press firmly until the USB flash drive is all the way in. Once the USB drive has been inserted you will be presented with an option to load the device.xml, then press Ok.
-
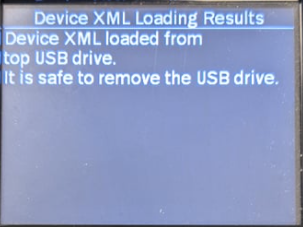
The Status Screen will display a message that it is safe to remove the USB drive. Remove the USB drive and wait for the device to initialize. It will take about 5-15 minutes and the POD will reboot by itself.
-
Navigate to Network Status page and verify that it shows “Connected” next to Echo360 Server.
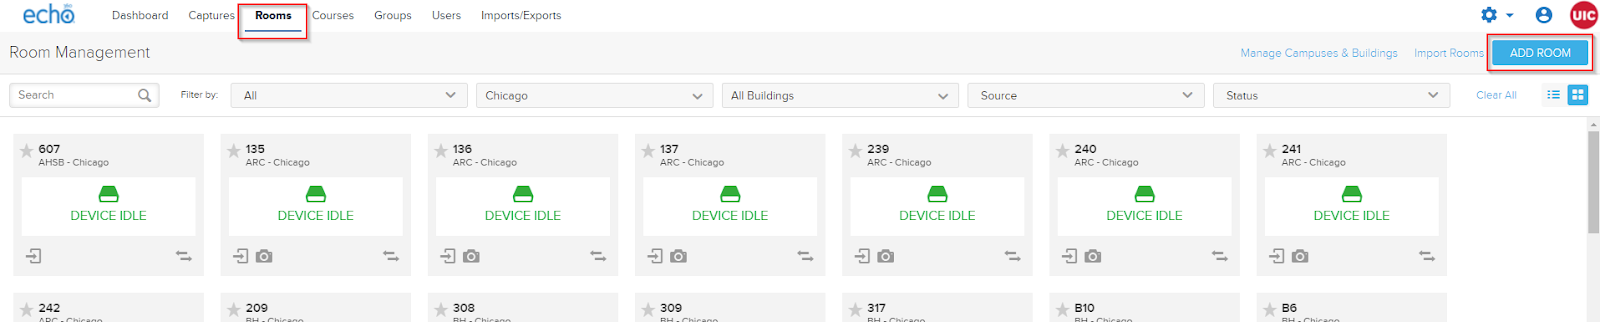
Creating a Room
-
Log into Echo360 as an administrator (echo360.org)
-
Click Rooms at the top of the page and then click ADD ROOM towards the top right.
-
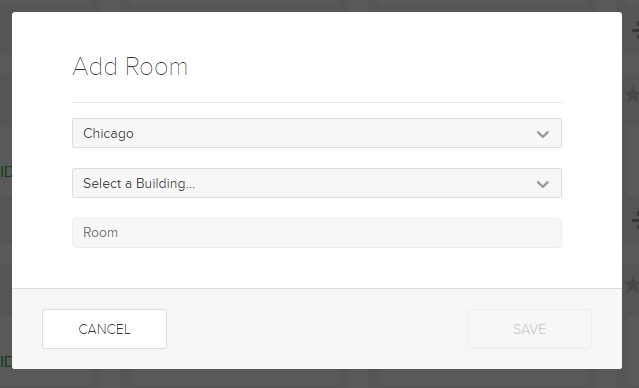
Select campus (Chicago), Building, and type in the Room number. If the Building does not currently exist, you can create one when clicking on the “Select a Building” drop down menu. The option (+Add new Building) will appear.
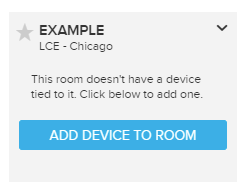
Assigning a Device to a Room
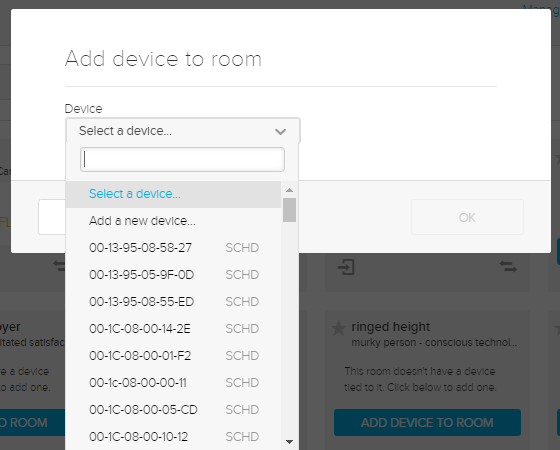
Devices are added to rooms, and each room can have one and only one device in it at a time. When rooms are first added to Echo360, they are shown with a big button that says ADD DEVICE TO ROOM so you are sure to do so.
-
Find the newly added room. You can filter the rooms by campus and building to find the room.
-
The room will be shown with a big button that says ADD DEVICE TO ROOM, like the following:
-
Click ADD DEVICE TO ROOM. From the Device list, select the MAC address of the device you want to add to the room. Use the search box to find the device if necessary, by typing the MAC address into the text box. To find the MAC address of the POD, from the status screen, swipe with one finger from left to right, select network, and select LAN network status. The MAC address will be listed there.